Configure UCaaS service for SIPREC
To enable Interaction Insights to record calls from the customer’s devices, assign a UCaaS service to the tenant and configure the relevant phone numbers that should be recorded. Refer to the table below for configuration of UCaaS services in this procedure.
|
Service |
Onboard Service |
Add SIP Connection |
Upload Numbers |
Configure Numbers for SIPREC |
|---|---|---|---|---|
|
WebEx Cloud Connect |
||||
|
Zoom Provider Exchange |
Upload Zoom Provider Exchange numbers directly from Live Platform |
|||
|
Live UC |
||||
|
Live CX |
The example in this procedure describes the setup for the Live CX service.
| ➢ | To configure UCaaS service for SIPREC: |
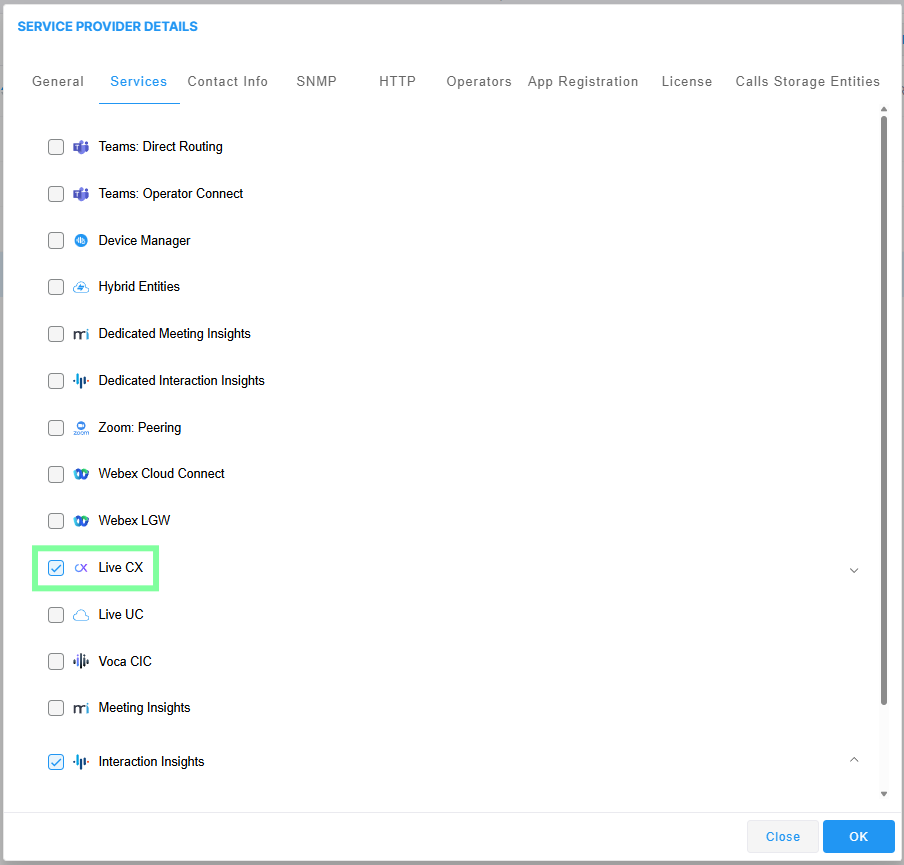
| 1. | Verify that the relevant UCaaS service is enabled for your customer tenant, and enable it if needed (see Setting Up Service Provider Tenants). In the example below, the Live CX service is enabled. |
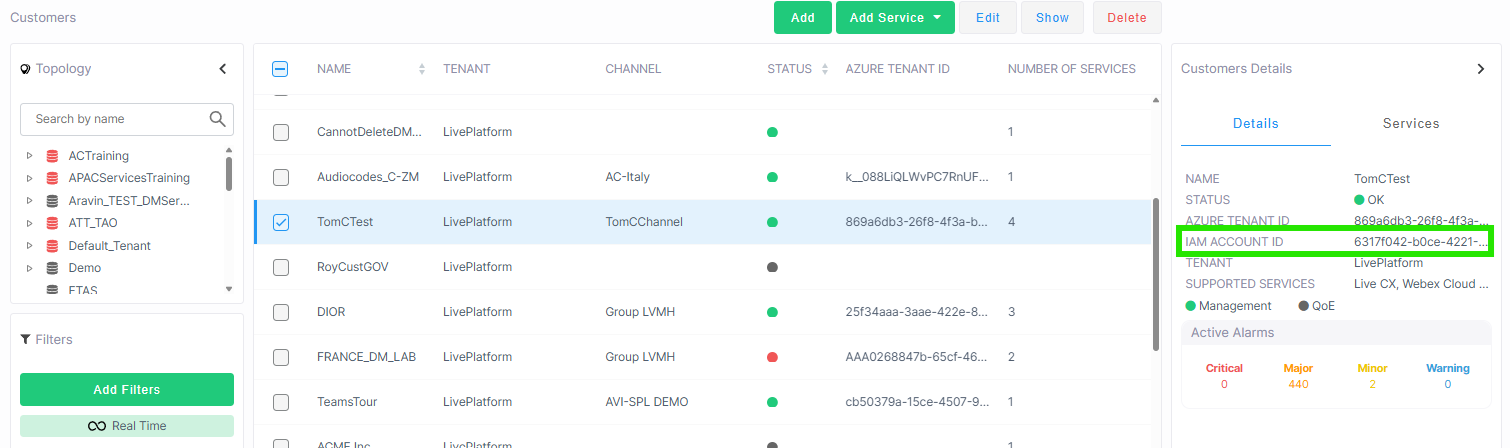
| 2. | Retrieve the customer's IAM Account ID: Navigate to Topology > Customers and select the customer from the list. Copy the value in the IAM Account ID field, which can be found in the Customer Details panel. |
| 3. | If not already done, add an Interaction Insights service tenant to the customer (see Onboard Interaction Insights Services). |
| 4. | Onboard the relevant UCaaS service (refer to the table above). |
| 5. | Add the relevant SIP Connection for the service (refer to the table above). |
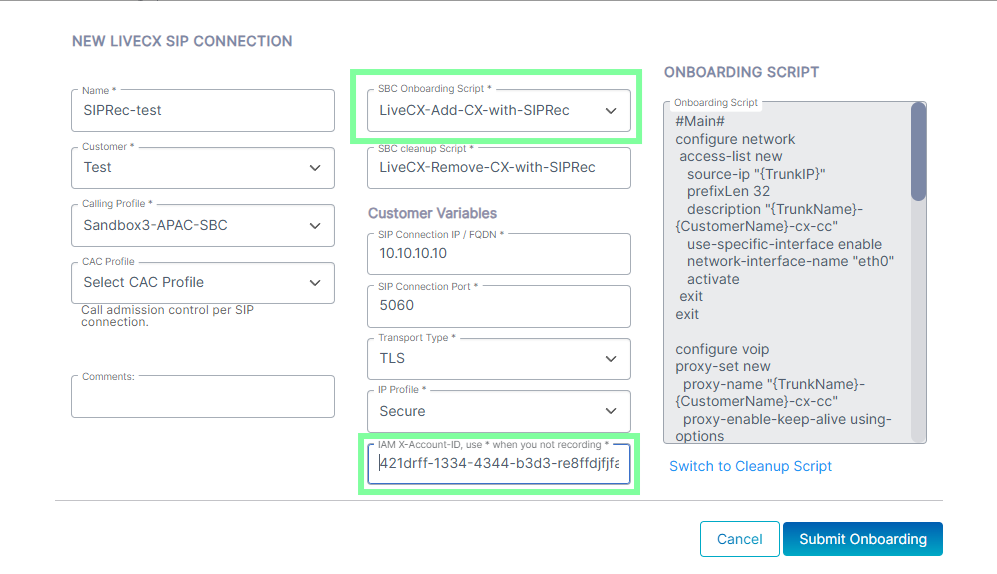
| 6. | For 'SBC Onboarding Script', select the supported script with SIPREC functionality. For example LiveCX-Add-CX-with-SIPRec. |
| 7. | Enter the customer's IAM Account ID that you extracted above. |
| 8. | Add a pairing SIP connection to the customer's PSTN (see table above). |
| 9. | Upload all numbers that should be recorded (see table above). |
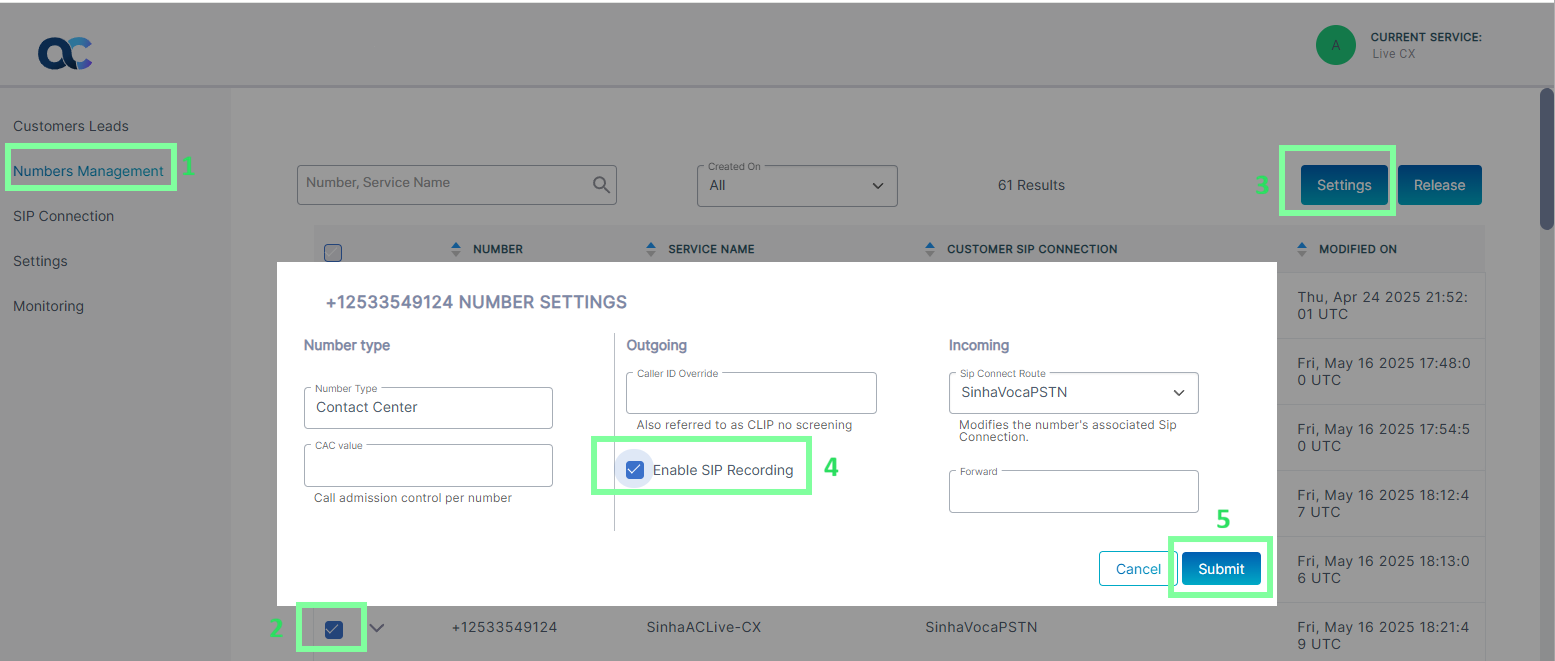
| 10. | Open the Number Settings page for each number to record (see table above): |
| a. | Select the number and click Settings. |
| b. | In the 'SIP Recording Type' field, type: |
| ❖ | Single: If the service was deployed with Interaction Insights Essential license which supports single recording. |
| ❖ | Double: If the service was deployed with Interaction Insights Pro license which supports double recording for redundancy. |
| a. | Click Submit. |
Important: For these numbers to be recorded, the customer operator must add them as devices in the Interaction Insights Service portal.